Updated: 31st Jan 2022 – covers the new V7
Table of contents
In June 2017 I finally bought myself a radio controlling sailing boat having wanted one for longer than I can remember, I went for a Joysway Dragonforce 65 V.6 (DF65) an inexpensive RC sailboat. I regularly sail a full sized boat and having made plenty of boats and gliders as a kid was especially curious about sailing an RC scaled down version. I hadn’t had RC models of any kind till now.
Having set it up and working, I realised there were a few things I wish I’d known before embarking on building it which prompted this post.
The post has since expanded into guide covering tuning, electrics, rigs, solving problems and sailing tips.
Tools
First off, in addition to a tape measure, make sure you have super glue, a sharp craft knife and ideally two pairs of forceps. I found myself using the forceps to tie small knots. The super glue is essential to prevent the dyneema thread fraying when you cut it, an alternative would be nail varnish. The idea here is to dab a drop of glue onto the thread, wait for it to dry and cut on that spot. Alternatives to super glue would be nail varnish and others have suggested a Berkley Hot Line Cutter.


Get used to this, you’ll be doing it a lot. Also, look carefully at how to tie the black bowsies correctly, there is a right way and a wrong way, fortunately the instructions are pretty clear. Before handling the sails, cut your fingernails as it’s easy to dent them.
Knots
Make sure you’re familiar some some basic knots, at a minimum:
- slip knot that won’t undo itself, see a slip knot
- a knot for making a non slip loop at the end of a line such as a bowline
- a round turn and two and a half hitches
- a knot for adding a loop to a line e.g. farmer’s loop, also known as a alpine butterfly knot

Preparing a farmer’s loop
Rig set up
Out of the box, the stand is quickly assembled and there isn’t a whole lot to do with the hull which is easily and quickly assembled which takes us to the rig.
Setting up the rig is a bit fiddly but once set up, nearly all rig adjustments will be made by moving the tensioning bowsies which is quick and easy. This post should also help prevent you making some of the mistakes I made.
I think the most important thing before putting the rig together is to set the mast step on the first graduation forward from centre. The mast step position alters the vertical angle of the mast, this is called mast rake. The mast can be raked forward and back.


The reason I do that before set up is it makes setting the forestay easier later on and gives you room for mast rake adjustments later.
 In the image on the left, if I needed to rake the mast forward, the gap at A wouldn’t leave enough play to allow further forestay tensioning. B might be ok. Redoing the forestay and jib halyard bowsies to get rig tension would be a pain.
For normal sailing the mast will mostly be set to centre.
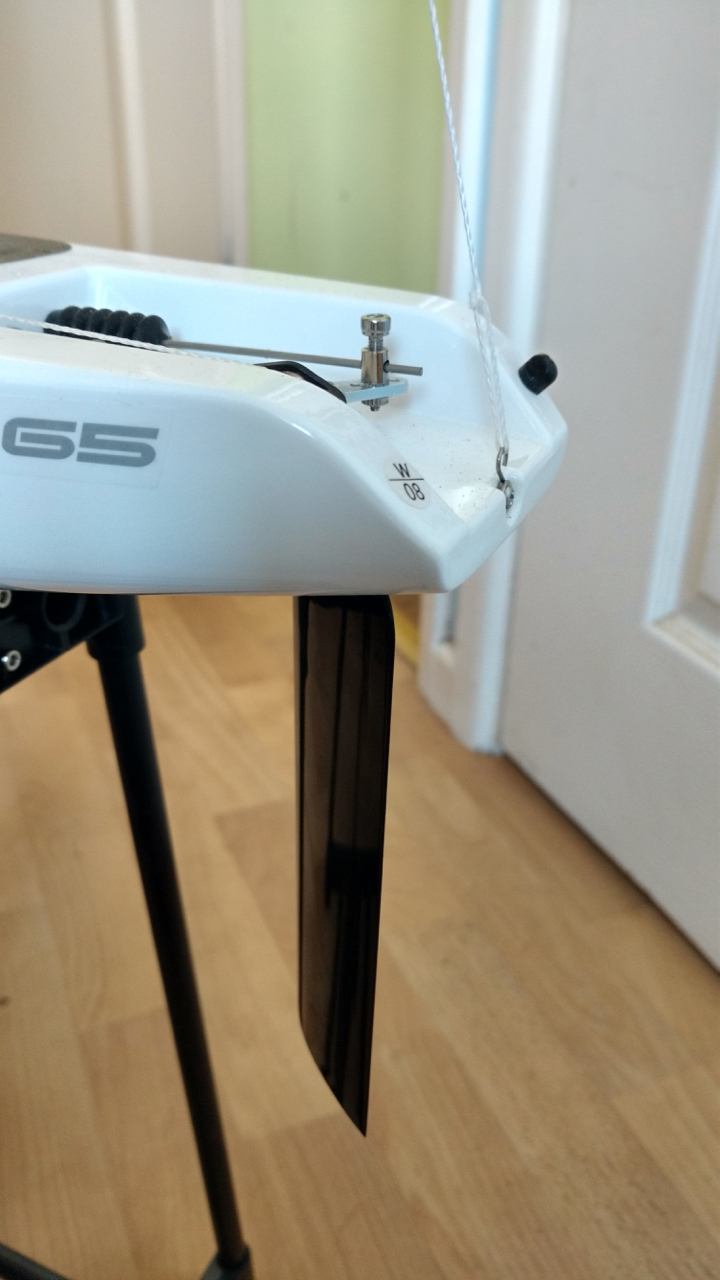
Continuing the theme, it’s also important to get the jib boom as low a possible. In the picture on the below, the boom is a too high, that could make tensioning the jib difficult and throws other settings out.


The image below shows the boom better attached, the line is attached to the boom using a round turn and two and a half hitches and hooked around the half eyelet with a bowline. A small drop of superglue on the knots is still a good idea to help prevent them slipping. The bowline below has slipped and will need redoing.
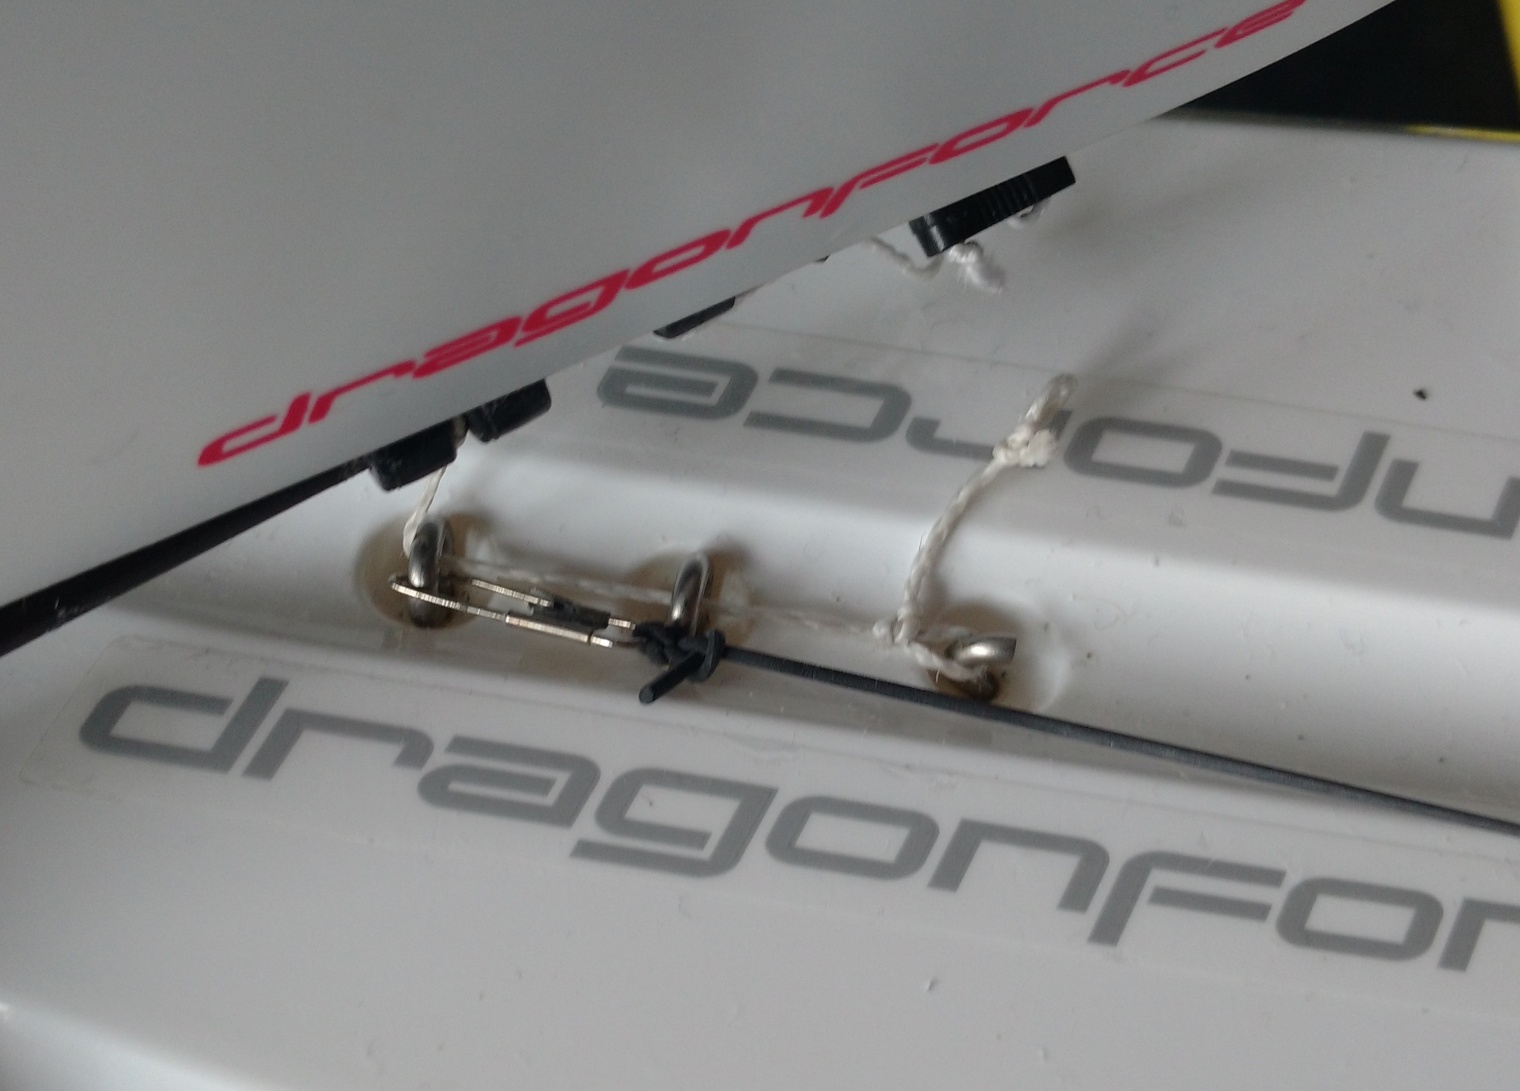
Using a metal swivel to fix boom to eyelet might work, but would probably break class rules if you intend to race. If I did need to rake the mast back, raising the jib boom would still be easier than reattaching forestay and jib halyard with more play.
You could even have two attachment lines permanently tied to the boom, one for a low boom position one for a higher boom position. Or with some nifty knot work, even two loops on one line.
There are other places where it’s important to get dyneema lengths and bowsies right. The picture below shows the downhaul tensioning bowsie for tensioning the main sail luff. The luff is the leading edge of the sail. In this picture below the bowsie is set correctly and the downhaul will be easy to set.

Make sure the sail is tied to the mast boom as close to the top as possible, in the picture below, this gap could be smaller. If this gap is too large, it becomes impossible to tension the luff with the downhaul bowsie (see above). N.B. not the luff needs much tension.

Once the rig is correctly set up, a nice design feature of the Dragonforce 65 becomes apparent which is that the whole rig can be removed from the boat very quickly by unhooking it in four places.

Smaller and larger sets of sails are available for the Dragonforce 65 for sailing in different wind strengths and the boat comes with an A set. For lighter winds there’s an A+ set and B and C sets for increasingly stronger winds. Rig suppliers are listed below.
All optional of course, I’ll be sticking with the A set. Keen racers will no doubt have rigs with different sail sizes ready to go.
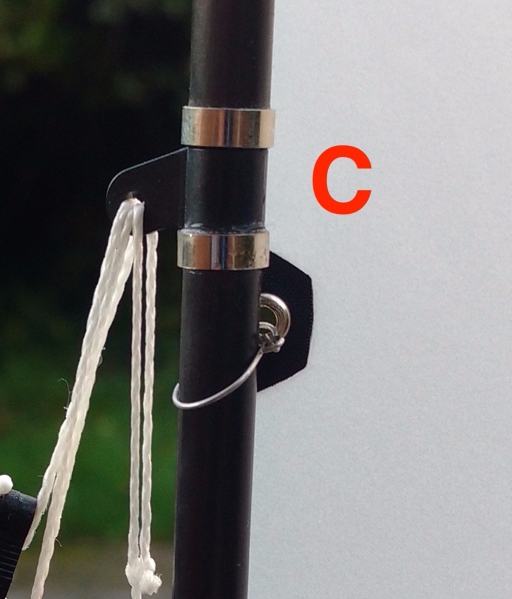
When constructing the mast make sure you glue the top and bottom parts together, C on the left. The mast won’t be straight under pressure if you don’t glue it.
As on a real boat, the rig is very adjustable; there is a downhaul to adjust main luff tension, a halyard for jib luff tension, adjusters for forestay and backstay tension and jib leech and main leech tension can be adjusted via a jib leech tensioning line and fully functioning vang respectively. Both jib and main also have simple adjustable outhauls for altering sail depth.
The mast rake setting will affect the lengths of the forestay and backstay, bear this in mind as you read tuning guides for the boat. If a tuning guide suggests fore/backstay measurements in conjunction with the mast rake setting, then this should be fine.
The instruction booklet provides a good guide to get you going and the tuning guide from Soch Sails is very good.

This video from Patrick Rynne is an excellent tuning guide. See the original Facebook post and discussion here.
Electrics
This is the bit I knew least about not having owned an RC model previously but it’s all quite straightforward. There is a servo for the rudder and a servo for the winch which adjusts the sheeting of the jib and main. Sheeting is about pulling the sails in or letting it out.
The pictures below show the electrics tray with servos and batteries. Note how the coloured cables are connected, this is hard to determine from the greyscale instructions sheet.


(Images showing how DF65 J5C01R receiver for J4C05 transmitter is connected to the servos).
It is possible to put the batteries further up into the hull near the mast and keel housing which alters the trim of the boat moving weight further forward. The images below show a Vapex 6v NiMH 950mah AAA pack connected with an extension lead.

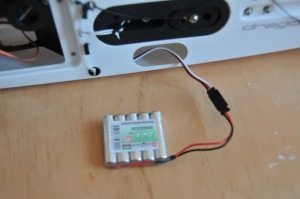
If even a few drops of water get into your hull, check the extension cable connector periodically as this will be prone to corrosion which will reduce electrical conductivity.
Mounting batteries by the keel box will raise the transom a tiny bit reducing drag which should theoretically increase boat speed, although in stronger winds more weight forward will increase the tendency to nosedive off wind.
Water can get inside the hull and you could wrap the batteries in cling film before putting them into the housing to keep them dry. I also put some tissue paper inside the hull to mop up odd drops. A standard measure to protect electrics from water is to spray them with Corrosion X, (discussion).
It’s probably a good idea to get some decent rechargeable batteries such Panasonic Eneloops. You’ll need eight of them, and the transmitter appears to beep when batteries are running low.
 Both rudder and winch have a dual rate adjuster screw on the transmitter. The rudder adjuster screw alters the rudder throw range and the winch screw alters the winch range between sheeted in and out.
Don’t have too wide a rudder throw range, e.g. throwing the rudder more than about 35° will effectively turn it into a brake (discussion). If you do have a big throw, just be aware that you can easily brake the boat, especially in lighter winds.
Make sure the rudder is dead centre in its neutral position and use the transmitter rudder trim adjuster button to center it as needed.
If your winch servo constantly chatters when sheeted in, loosen the main sheet a little. A constantly chattering servo is working which will wear it out sooner and eat the battery.
Alternative Transmitter and Receiver – Flysky FS-i6
During a recent boat refit, I recently switched my DF65 over to the Flysky FS-i6 system. This is a slightly more advanced system than the default one which – among other things – lets you monitor battery power in the both transmitter and boat and set the endpoints better. I like it better and consider it a worthwhile upgrade.
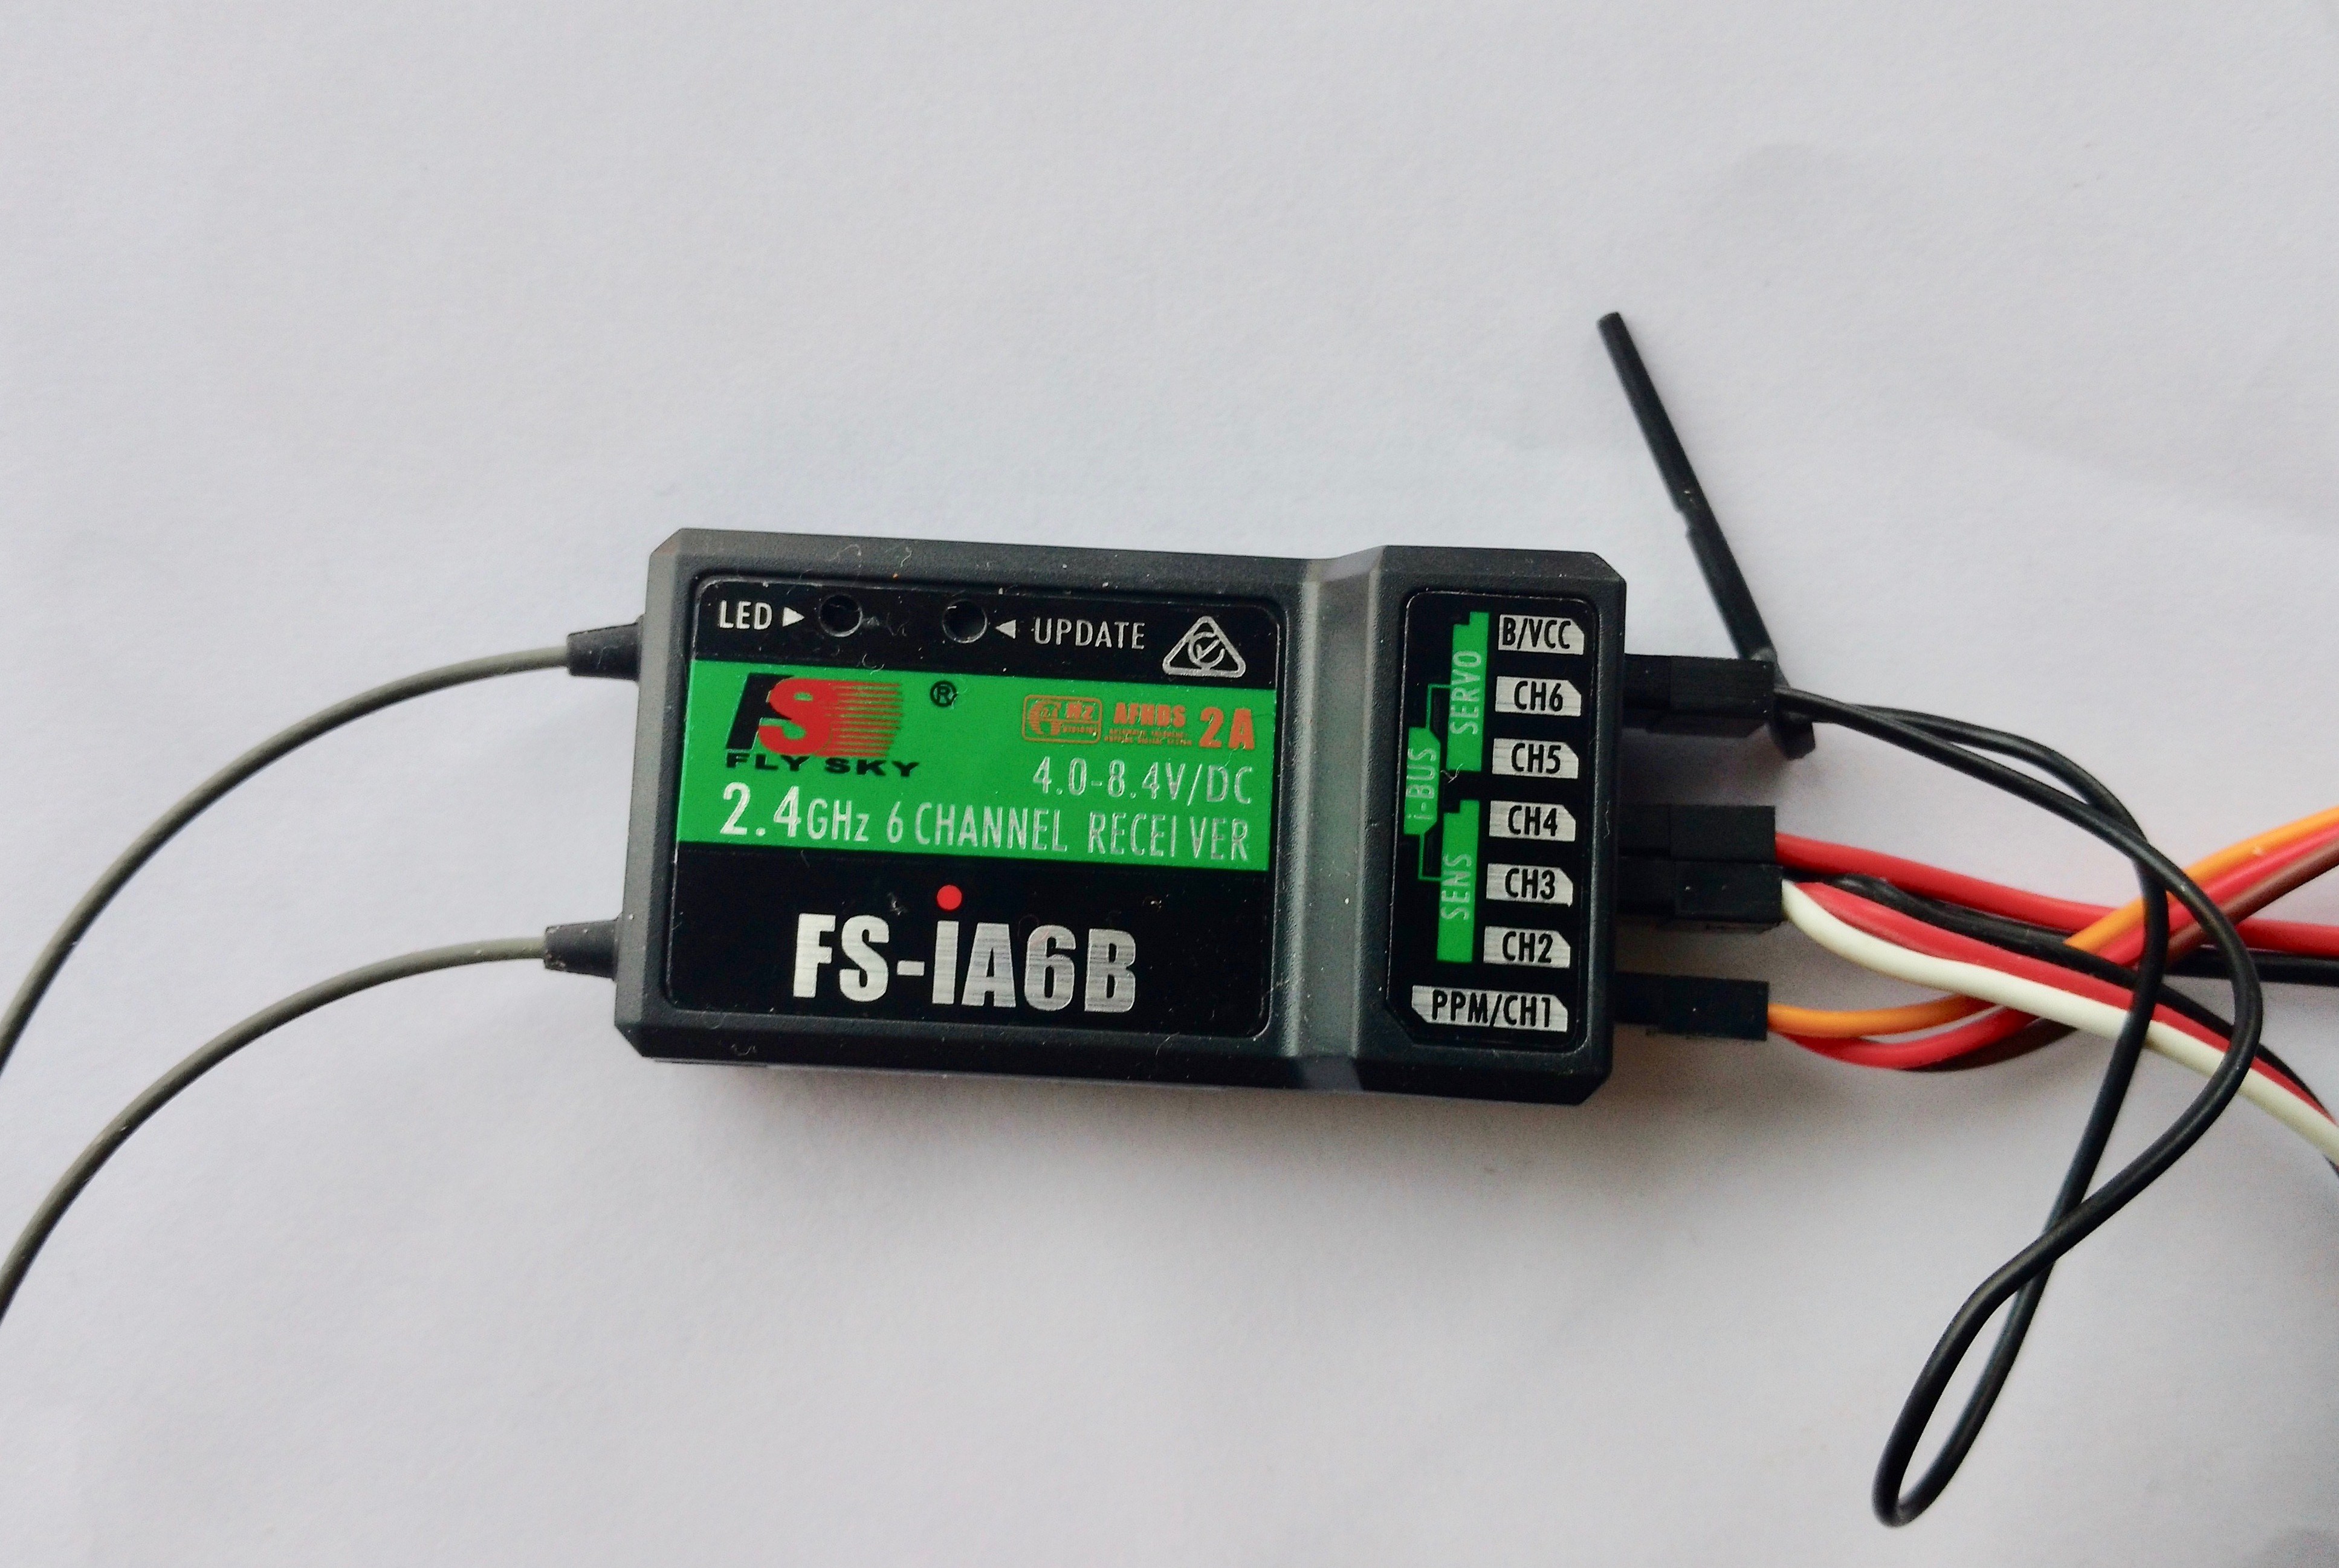
Out of the box, to set it up I did connected it as follows:
B/VVC – the binding plug
Channel 1 – Rudder: red and black
Channel 3 – Winch: white, red, black
Channel 4 – On switch (power): orange, red, brown.
To bind the receiver to the transmitter do this:
1. On the transmitter, push the switches up and pull the left winch control down
2. Turn the receiver on
3. Hold the bind button on the transmitter and and turn it on
See an instruction and setup guide for the FlySky FS-i6 Transmitter(Tx) and FS-iA6B Receiver(Rx) by David Flakelar, here.
Boat Care
I always leave some paper tissue in the hull whilst sailing to collect odd drops of water which might get in to the hull.
Clean the boat with fresh water after use, and dry the hull and sails with a soft cloth or paper tissue, paying attention to the sail eyelets and all metal parts.
After sailing, remove the deck hatch / seals to air and dry the hull should there be any water ingress, do this immediately. Also release any tension from the sails.
I always dry the two metal boom bearings as best I can with a paper tissue and drop a couple of drops of oil on them to displace water. These can rust.
Take care not to dent or bend the sails, hard objects including finger nails will damage them, more so with third party sails made of thinner materials e.g. Soch Sails.
If you mount batteries on the keel box, check the extension cable connector periodically as this will be prone to corrosion which will reduce electrical conductivity.
Water can get in through the on/off switch bellows so check your on/off switch periodically. After a year and a half of use I replaced mine as it had rusted and become unreliable.
I also put silicon grease into the the mast hole periodically, this and the mast where it sits will eventually wear giving a bit more mast wobble.
Finally get the batteries on a charge ready for the next sail. 🙂
Tuning the Dragonforce 65
Or solving basic sailing issues.
1. The boat keeps heading up and won’t track straight
Check the basics; is the mast rake central? Check that the angles of jib and main sail booms are correct, that sail depth (outhauls) and leech tension (vang and jib leech line) are correct (see the booklet, tuning guides #, # ). Check that the rudder has the correct neutral position. Check that the jib boom is attached correctly and is the correct distance forward from the mast.
If your basic boat settings are correct and it still heads up, try the following (one at a time and not necessarily in order):
- flatten the main by increasing its outhaul
- increase main twist by reducing vang (main boom will go up)
- ease the main sheeted in position a little or
- tighten the job sheeted in position a little
any of those changes in light to moderate winds can make a big difference.
Experiment!
Also, it’s likely not possible to make it track straight in all winds, e.g. it could be set up perfectly for light winds and still want to head up in gusts.
2. The boat won’t tack
Check that the jib boom isn’t too far forward, do not extend the jib boom counter balance. If the jib appears to flick across the deck back and forth, it’s too far forward. It could also be that you don’t have enough speed going into the tack, in stronger winds with waves, bear away to gather extra speed and then tack. Waves hitting the side of the boat can prevent it tacking. Does the jib have enough depth in the sail? Is the forestay and jib halyard too tight? If you have tacking problems bring the boat back to you by gybing it around.
3. You can’t get the boat out of irons
Meaning you tack and the boat stops and won’t move, ease the sails a little then try pumping the rudder on one side (fast, slow return and repeat), check your jib boom position (above). Don’t force the rudder into a far left or right position, you aren’t driving a car.
4. The boat won’t respond to the rudder
Assuming electrics and battery are ok, check your rudder throw. Is it moving? Is the rudder stiff or stuck? When heeled over, the boat will be less responsive to rudder steering because as the boat lies flatter, the rudder acts more as a hydroplane. In this situation, sheet out first to level the boat, then steer. Did you use the correct lubricant for the rudder bellows? Grease will make very sticky. Is the boat caught in weed? Be patient and it will hopefully free itself.
5. The boat is heeled over all the time
The wind strength is too strong. Your options are to use a smaller set of sails, wait for less wind, or de-power the rig. De-powering only works so far but to de-power the sails, flatten them by increasing the outhaul, increase main twist. Also, sheet in less the reduce the sheeted in position so long as the boom doesn’t drag in the water.
The closer the booms are to the centreline when sheeted fully in, the better the boat will point (sail closer to the wind) but the more it will heel over. You can sacrifice pointing ability for rudder control and better course direction. Remember, the more the boat heels, the more it also slips sideways.
Experiment with feathering the boat into the wind to get a good balance of forward speed and heel, and experiment with different sailing angles and degrees of sheeting. I’ve had good results with the default A rig even in quite strong winds.
6. The boat won’t go downwind
First, make sure the booms will go out far enough when fully sheeted out. Assuming rudder and electrics are good, and that otherwise the boat is well set up, it’s likely that there is too much wind and your boat just wants to head up. It is perfectly possible to have the boat trimmed so that it will beat (go into the wind) in strong winds but it won’t then come back to you easily. Either use a smaller set of sails or don’t sail, it’s not worth losing the boat.
7. The boat only tracks straight on one tack
Is the mainsheet bridle dead central? Is the rudder dead central?
8. The boat nose dives
This can happen in stronger winds. Make sure the rig isn’t raked forward, use batteries in the servo tray location to move weight further back. Allow the boat to gain speed before bearing away downwind, use a smaller set of sails. Avoid sailing dead downwind, this is the slowest point of sail and as such pressure on the rig will be strongest. The wind could also just be too strong.
9. The boat won’t power up
Most likely the battery holder, connector cables or switch is rusty. Replace any components with rust anywhere and spray with some corrosion x , it’s not worth risking your DF 65 losing power on the water.
Different rigs and sail sets
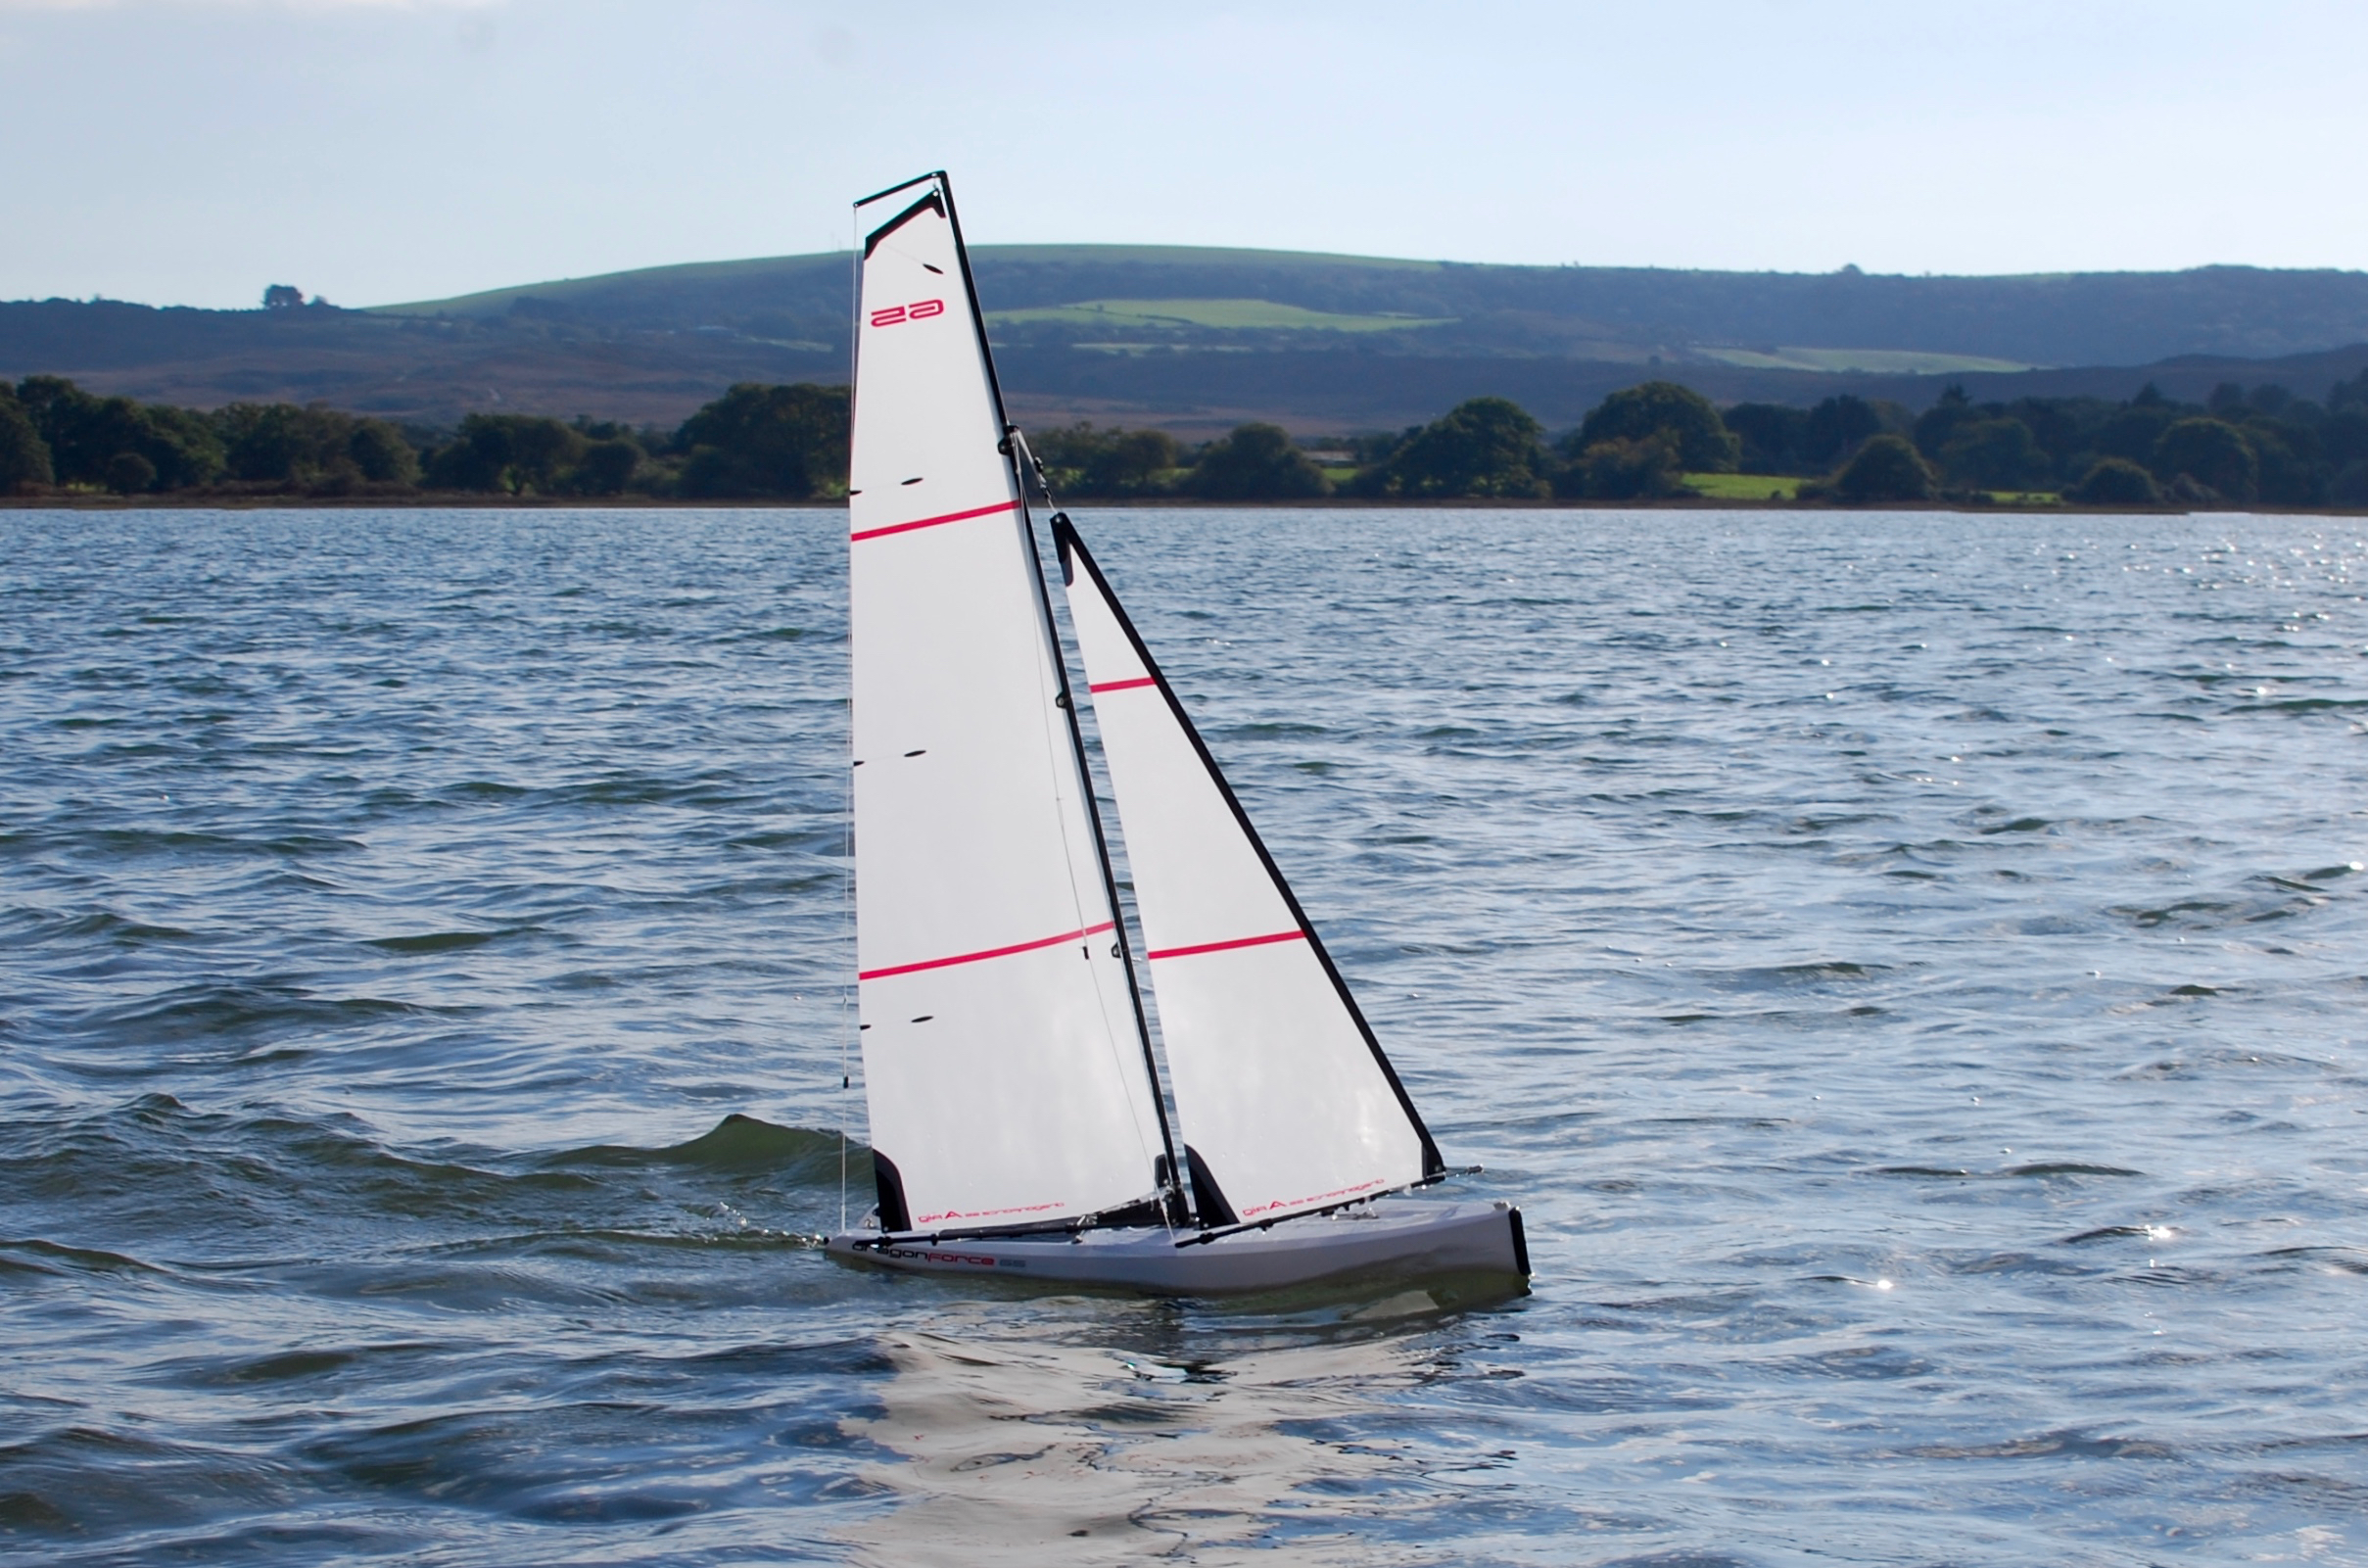
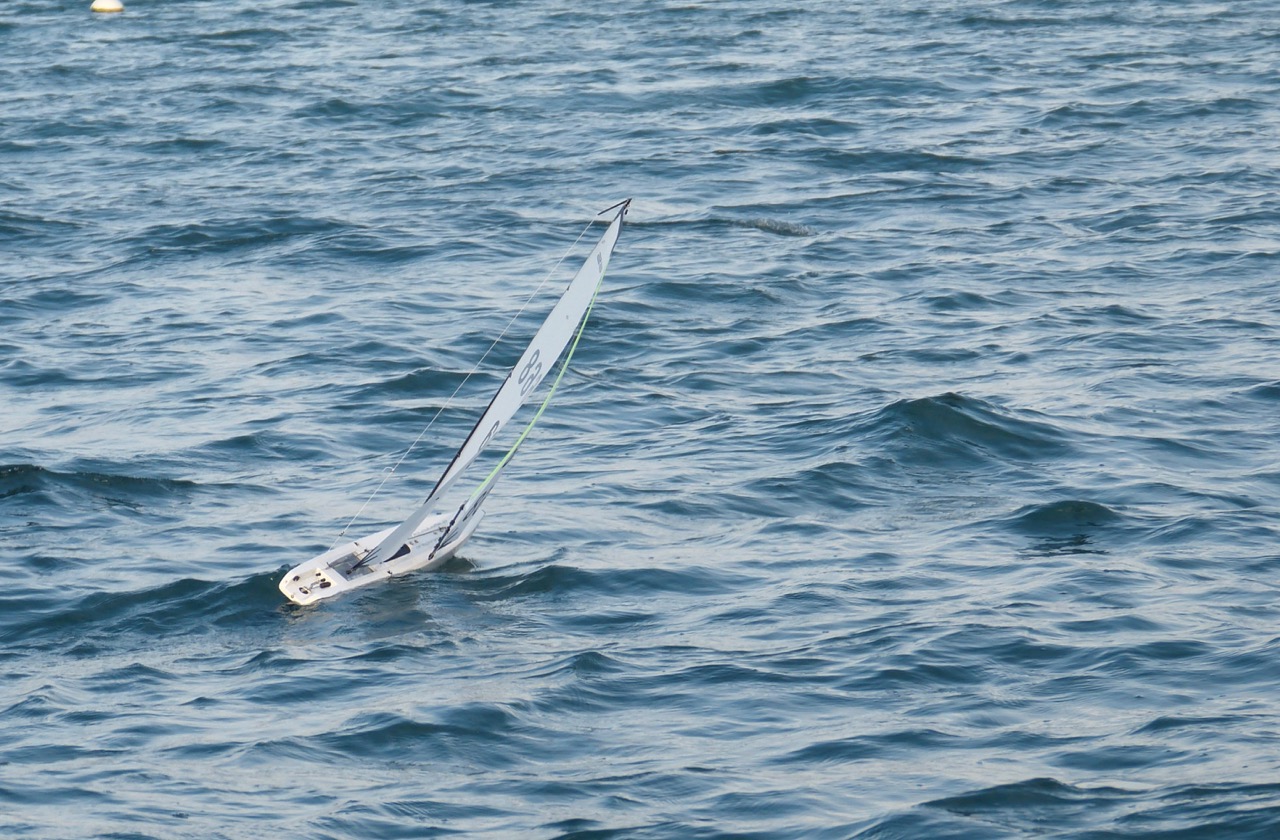
From the factory, the DF 65 comes with an A rig. Smaller and larger rigs are available made from different materials. Since I first wrote this post in 2017 I bought a set of A+ sails from Sochsails which have become my favourite rig set.

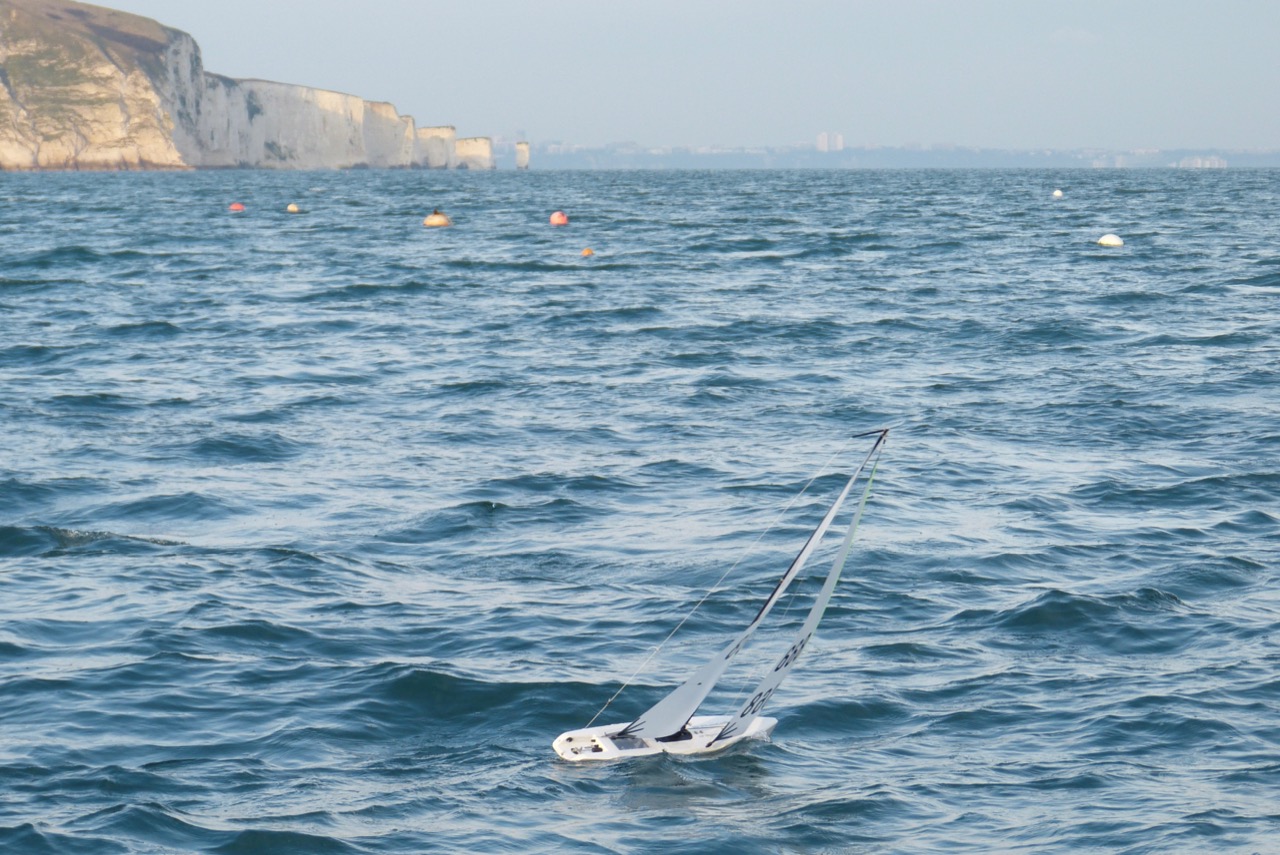
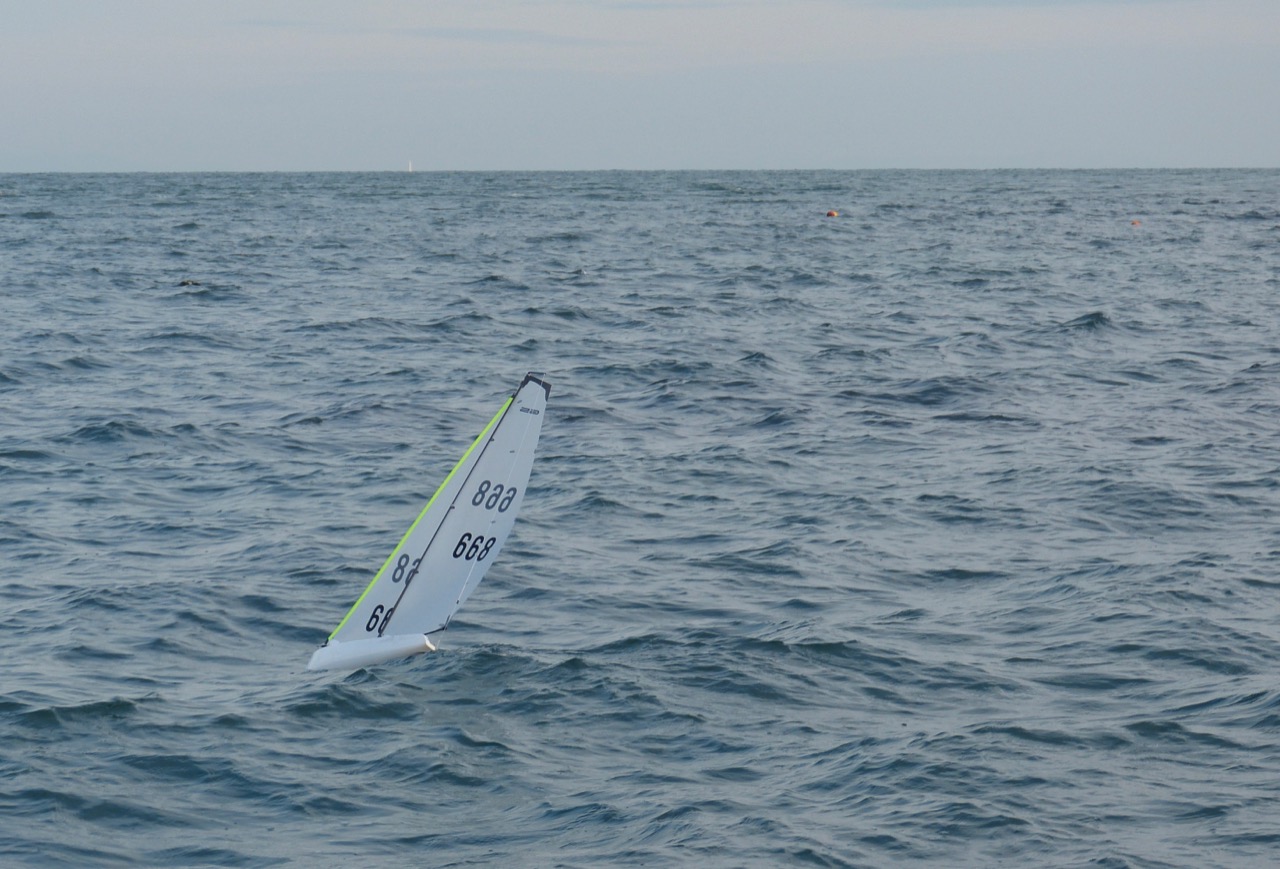
The A+ rig is bigger than the default A rig and transforms the performance of the boat. It’s much more responsive in very light winds and in my experience is manageable up to 11 – 12 knots. The images above were a 7-12 knot day.
Third-party sails are available in different materials. My A+ set is mylar which is a lighter less tough material than the stock sails. There are some pros and cons here worth bearing in mind; mylar film is lighter and more responsive in light winds e.g. the sails will flip across more readily when tacking, is louder when luffing which provides better audible cues to know what the boat is doing, but the material is more sensitive to hard objects such as finger nails, or dents.
Transporting the boat fully rigged with mylar film sails in a vehicle need more care and it’s probably worth looking into a sail bag.
Another tip with mylar sails is to make sure the clew is crimped closed so that a flapping sail doesn’t come free.
V6 vs V7 What’s New?
The DF 65 V7 was launched in 2021 and is different in two ways from the V6:
- Upgraded sail winch, higher power and increased accuracy. Read more here.
- An upgraded stand which allows laying on the side. Thestand upgrade can be purchased, e.g. here.
Otherwise, it’s the same. Hardcore racers might go for the upgraded winch on their v6, but it’s quite a bit more expensive.
Final thoughts
The Dragonforce 65 V6 /V7 is a good quality product and great value for money. The boat has very good sailing qualities and its relatively small size means it can be put in the car fully assembled, avoiding the hassle of dissembling and reassembling. The transmitter is solid and works well.
The rig is very configurable, easy to tune and comes in a variety of size options. Switching rigs is super quick and easy, parts and sails are easy to find and also relatively inexpensive.
The initial rig set up requires patience and a little time and this is definitely not a simple toy. The boat hull does need to be aired when off the water and the deck seals whilst simple are a bit fiddly, I use electrical tape now.
The Dragonforce 65 is a hugely popular class of boat which means if you want to race, the chances of finding a fleet probably look good, and for the money, I think it’s an excellent package and a lot of fun.
Alternatives
The RC Laser – http://www.rclaser.org.uk/
The Micro Magic – http://micromagic.info/ – similar price range
The DF95 – the DF65’s big brother – https://dfracing.world/df95/
There are plenty of other boats but the top two seem to be well adopted at least in the UK. My local radio yacht sailing club have these classes which could give you further ideas.
A bit of boat Zen with my DF 65 on a calm lake (read more).
Resources
https://dfracinguk.com
http://www.rg65usa.org/dragon-force-resource-center.html
http://www.abersochboatyardservices.co.uk/Dragon%20Force.php
In the press
A good article in Sailing World, https://www.sailingworld.com/inside-classes-dragonforce-65/
The boat and spares
http://www.joysway-hobby.com/c/rc-sail-boat_0021
https://www.wirelessmadness.com
http://www.radiosailing.co.uk/ , spares
Sails
https://soch-sails.myshopify.com/
https://hotrcsails.com/ – CA
http://www.catsails.co.uk/dragonforce65.html
Tips, Tuning and Mods
DragonForce 65 Tuning – Patrick Rynne Video, top tip!
Sochsails tuning guide
https://radiosailing.net/blogs/news/building-your-df65-a-rig-kit
http://www.abersochboatyardservices.co.uk/Dragon%20Force%20Hints%20&%20Tips.php
https://dragonforce65.us/tip-and-hints/
https://dfracinguk.com/hints-tips/
https://dfracinguk.com/df65-rigging-tuning/
Sealing the keel trunk and fin
DF65 Rigging and Tunning 1, 2 ,3 Youtube vids
Instruction and setup guide for the FlySky FS-i6 Transmitter(Tx) and FS-iA6B Receiver(Rx) by David Flakelar, here.
Knots
http://www.animatedknots.com/indexboating.php
https://www.netknots.com/fishing_knots
DF65 Facebook group discussion on knots
Racing Associations
https://dfracinguk.com/ – register your boat to get a sail number (UK)
https://mya-uk.co.uk/
http://theamya.org/boats/df65/ – register your boat (USA).
https://dragonforce65.us/ – US DF65 class owners website
https://www.facebook.com/groups/dragonforce65worldwide/ – top tip!
https://www.facebook.com/groups/DF65USA/


Very informative
Have just purchased one of these to give it a go .⛵️
LikeLiked by 1 person
Excellent run down. The DF 65 V6 is a much better boat than the previous version DF65 .
One tip for you. The transmitter in the boat has a short aerial and this needs to be mounted horizontally near the deck underneath ( in the dry ) What I do is slip the small antennea cable into a plastic drinking strawer ( thus keeping it straight which is the best for transmitting and receiving ) and then tuck it up under the deck near the gunwhales. Hold it along the underside of the deck with doube sided velcro.
Don’t have it waggling about behind the electrics and winch area.
LikeLike
We are starting up a club racing the DF65 and we are finding the transmitters interfere with other boats. Can you tell us how to deconflict them?
LikeLike
Sorry Robert, I don’t have experience with this. There are a number of DF65 facebook groups for different countries, perhaps they might help.
LikeLike
Hi
You seem to have a problem with the ” binding ” process whcih electronically liknks your transmitter to each receiver.
Courtesy of Josway J4Co5 unit.
1) Push down the throttle stick fully to its stop ( left stick, Mode 2 ) and switch on the transmitter
2) Switch ON the receiver on the boat.
3) Presss the button which says ” BIND” on the receiver until the LED flasheson the receiver, then release it. When the receivers green light is on the connection is syncronised for that selected transmitter and creciever. IE it is a unique link.
Should you ever replace the reciver in the boat, do it all agai for that selection to your transmitter.
See Joysway Instruction Manual from which this info has been taken
LikeLike
Hi, Hopefully you have an answer to this by now but just in case.
You will need to _SET UP NEW ID for J4C05 TX:
1) only 1 boat and 1 transmitter, switch on RX (boat), make sure throttle stick on TX is at neutral position.
2) Push the two trim button (at bottom of two TX stick) toward the left side (left trim button) and right side (right trim button) and hold.
3) switch on TX, hold the two trim button for about 3 seconds and release, now you have set up the new ID for TX.
4) rebind the TX with the boat. make sure no other TX and RX(boat) are power on. Details in your manual.
LikeLike
I’ve just bought 2 DF65s and I followed the bind instructions but each transmitter controls both boats. Anyone else seeing this? I tried bind process 50 meters apart and still same problem.
LikeLike
Completely naive to any kind of sailing and I thought this was a “beginners” boat, nevertheless I am determined. I had just tied the first bowsie with a square knot and a drop of superglue when I realized I had it upside down. Will that really make a difference? Is there enough dyeema cord to allow for mistakes? I’ve stopped to learn more, which led me to your blog, and I’m learning the knots you’ve suggested. How do you know which knot to apply where?
LikeLike
>Will that really make a difference?
It’s been a while but I think this will make it prone to slip, correctly done it’ll lock in position. I made a fair few mistakes when I first did mine but if you can I would recommend buying another length of chord just to ease any concerns.
>How do you know which knot to apply where?
Good question and I’ll update my article to answer that, important to get right are the knots which tie things to things. e.g. it doesn’t matter if a loop tied around a ring slips to fully closed (but not further) whereas the loop which holds the jib mustn’t slip. When I set up my A+ rig I used a ’round turn and two and a half hitches’ further secured with a drop of glue for loops which could close (e.g. chord attached to rings) and a bowline for the jib loop.
Stick with it, assembly seems to take an age but soon you’ll be sailing.
LikeLike
Will you be updating your article soon? (I’m looking forward to doing this project correctly and waiting to continue assembly based on your response.)
LikeLike